What are you looking for?

Tuesday, 8 November 2016

Furthermore

This stitch is also used to fill a design. It is also used in sashiko embroidery form of Japan. In India the people of West Bengal have discovered many variations under the name of Kantha Work.

Sashiko embroidery 
----------------------------------

Given above is an illustration of sashiko embroidery worked on bedsheets, pillow covers, quilts etc. It is nothing but simple running stitch worked along the outline of a design repeated all over the material. 


Kantha embroidery 
--------------------------------

This type of embroidery is a very old form of embroidery  which is prevalent in West Bengal where housewives used this simple format in different ways to decorate their homes. 

Jod stitch
------------------
The first stitch is called Jod stitch  where parallel rows of running stitch are worked symmetrically. It can be used to fill designs. 


Bejod stitch
-------------------

The next stitch under kantha embroidery is Bejod  stitch . 
This also looks like parallel stitch except that first a row of running stitch is worked and the adjacent row of stitches are worked in the gap between the stitches in the first row.  This is also worked to fill a design. The concept of this stich has been represented in the sample below. 

Kantha Butti
---------------------
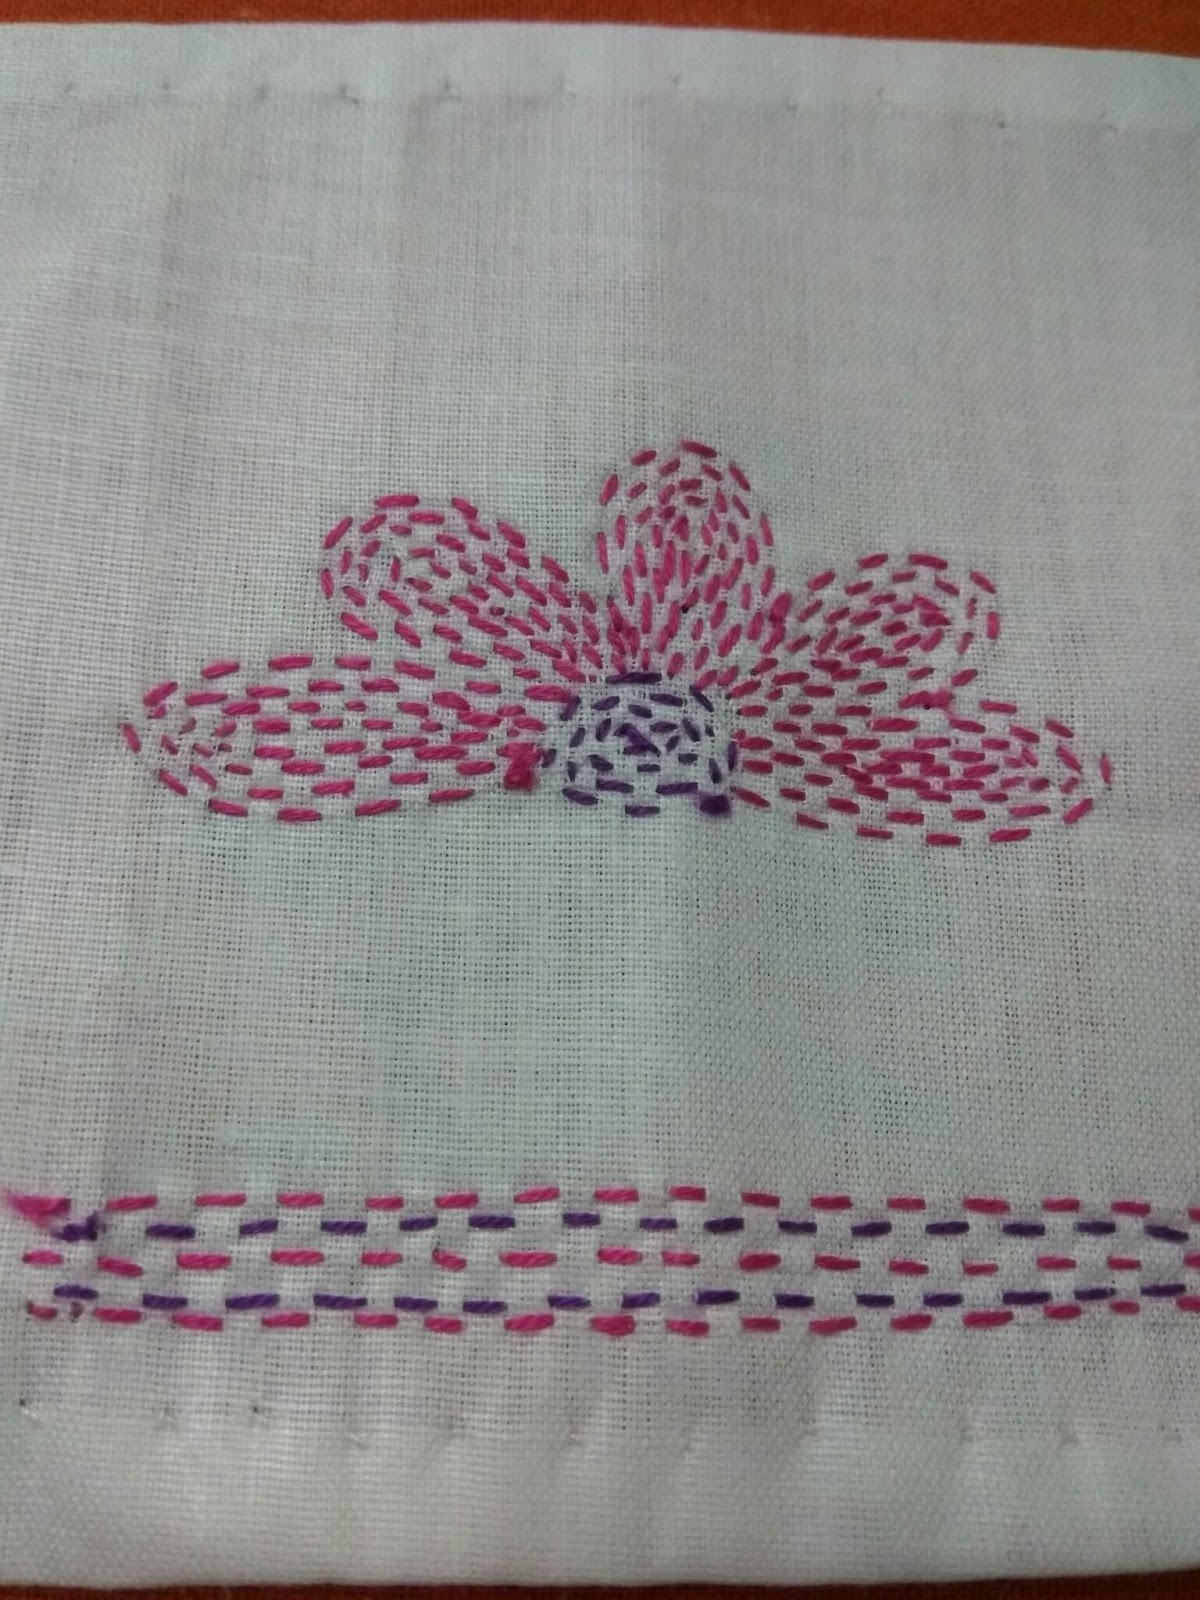
Kantha butti is the stitch where kantha stitch, that is,  running stitch is worked in close rows to fill up the motif or design, thus giving a satin stitch feel. 

Charkhi  Butti
-----------------------
This stitch is used to fill petals of flowers just like kantha butti, but, it is done in a slant manner. This slant stitch  is worked in continuous pattern to fill the design giving a satin stitch feel. 

Closed Herringbone Stitch
---------------------------------------------
This is a stitch which is used with running stich in kantha work to fill motifs. A design sometimes needs filling up and this is one such stitch have which can also be used to fill . 

Variations of running stitch


Over the years I have learnt from many tutorials about the different variations that can be worked with this simple stitch. 


Laced running stitch
---------------------------

First a normal running stitch is worked along a line.
Displaying IMG_20170207_184715.jpg
Then a contrast coloured thread is taken and fixed in the gap between two existing chains.  Here first I have stitched arow of running stitch in red,then i have taken a green colored thread .

Displaying IMG_20170207_184807.jpg
Now I have weaved the green thread in and out of the red running stitch without piercing the cloth with the needle.

Displaying IMG_20170207_184939.jpg
This is done without pulling the green thread too much.

Displaying IMG_20170207_185424.jpg
Hence we get a wavy version of Running stitch.


This stitch  is worked by weaving the contrast colored thread in a wave like pattern around an existing running stitch.                                                                                                                  


Parallel running stitch
----------------------------------------
This stitch is when two or more lines of running stitch is done in a symmetrical pattern as shown in the design below. 


Double running stitch
-------------------------------------
This stitch is a blend of two contrasting colors which has are  used alternatively in simple 
running stitch. As can be seen in  the straight line above the design I have first done the running stitch  in pinkcolor and the I used the green in the gap between the pink line. 

Displaying IMG_20170207_114656.jpg
Here I have first done running stitch using pink  thread. 

Displaying IMG_20170207_114740.jpg

Then I have fixed the green coloured thread in the gap between the first two stitches. 

Displaying IMG_20170207_114906.jpg

As we proceed the green thread is used between the existing stitches. 
Displaying IMG_20170207_114933.jpg


Displaying IMG_20170207_115312.jpg


This will be more attractive when two contrast coloured threads are used. 


Whipped Running Stitch
-----------------------------------
This stitch is done by weaving a contrast coloured thread around the existing running stitch without moving the needle through the cloth .It can be done by moving the needle from the right side of the stitch to the left as shown below.
Displaying IMG_20170208_131327.jpg
Here also first a basic running stitch is worked and then the needle is fixed in the gap between the first two stitches. 

Displaying IMG_20170208_131351.jpg

Then the needle is inserted through the first stitch from the right side  of the stitch. 

Displaying IMG_20170208_131539.jpg
Care is to be taken not to insert the needle into the cloth. 

Displaying IMG_20170208_131858.jpg
  This is done for the whole length of the line. 

This can also be worked from left side of the stitch to the right as shown below. 
Displaying IMG_20170208_133313.jpg
Here also first a basic running stitch is worked and then the needle is inserted in the gap between the first two stitches. 
Displaying IMG_20170208_133334.jpg

Now the needle is inserted through the existing stitch from the left to right of the stitch. 
Displaying IMG_20170208_133410.jpg


Care is taken not to insert the needle into the cloth. 
Displaying IMG_20170208_133509.jpg

This is done for the whole length of the line. 
Displaying IMG_20170208_133716.jpg

The basic difference between whipped running stitch and Laced running stitch is that in Laced running stitch the thread moves along the existing stitch from left and right of the stitch alternately so that we get a wave stitch. 

But in whipped running stitch the thread is moved through the existing stitch in the same direction. 


  Here are some more samples on Parallel Running Stitch.


Running stitch


I was introduced into the beautiful world of hand embroidery in school. We had Miss Shalini as our crafts teacher.
    The first stitch that she taught us was Running. It is a simple straight stitch which can be done by moving the needle up and down a cloth in a straight line at regular interval.

    I have tried to illustrate the procedure to do running stitch with a series of pictures.


  To make the work look neat we need not put a knot in the thread.we can fix the thread to the starting point by making a small straight stitch at the beginning as shown below.                                  

Displaying IMG_20170207_112427.jpg


Displaying IMG_20170207_112457.jpg


Displaying IMG_20170207_112516.jpg

Once the thread is fixed at the starting point we can make a series of straight stitches by moving the needle up and down the cloth at regular intervals as shown  below.
Displaying IMG_20170207_112635.jpg


Displaying IMG_20170207_112704.jpg
Hence by continuing in a straight line we would get RUNNING STITCH. I have used this stitch to make an outline of a floral design in the foollowing sample.


Displaying IMG_20161107_000017.jpg


I had got my first pat of appreciation when she saw my work on a table cloth. I have not been able to preserve it till now but I have tried to maintain the skill I acquired under Miss Shalini 

She had specified that any work of embroidery would be at its best when the back side of the cloth also presented a neat  picture. I try my  best not to  create a web of threads in my work by making small batches of the same colour . 


This stitch can also be used to fill up a design .  When it is worked close together it is a filling stitch.