What are you looking for?

Tuesday, 20 June 2017

Lining kurti

Hi friends, people think that stitching with lining is difficult. But actually it's not.
What we usually do is cut a top material and make a neck of our choice. To stitch the neck we cut out a shorter version of the same shape and fix it on the right side of the cloth. Once it is stitched, flip over the small neck piece to the wrong side of the top. Stitch along the edge.
When we stitch a top with lining instead of a small neck piece we cut the lining cloth the same size as the top.
Then keep the right side of the lining facing the right side of the cloth and stitch along the edge of the neck.
Once that is done flip over the lining and stitch along the edge all around the top.
Double this for both front and back.
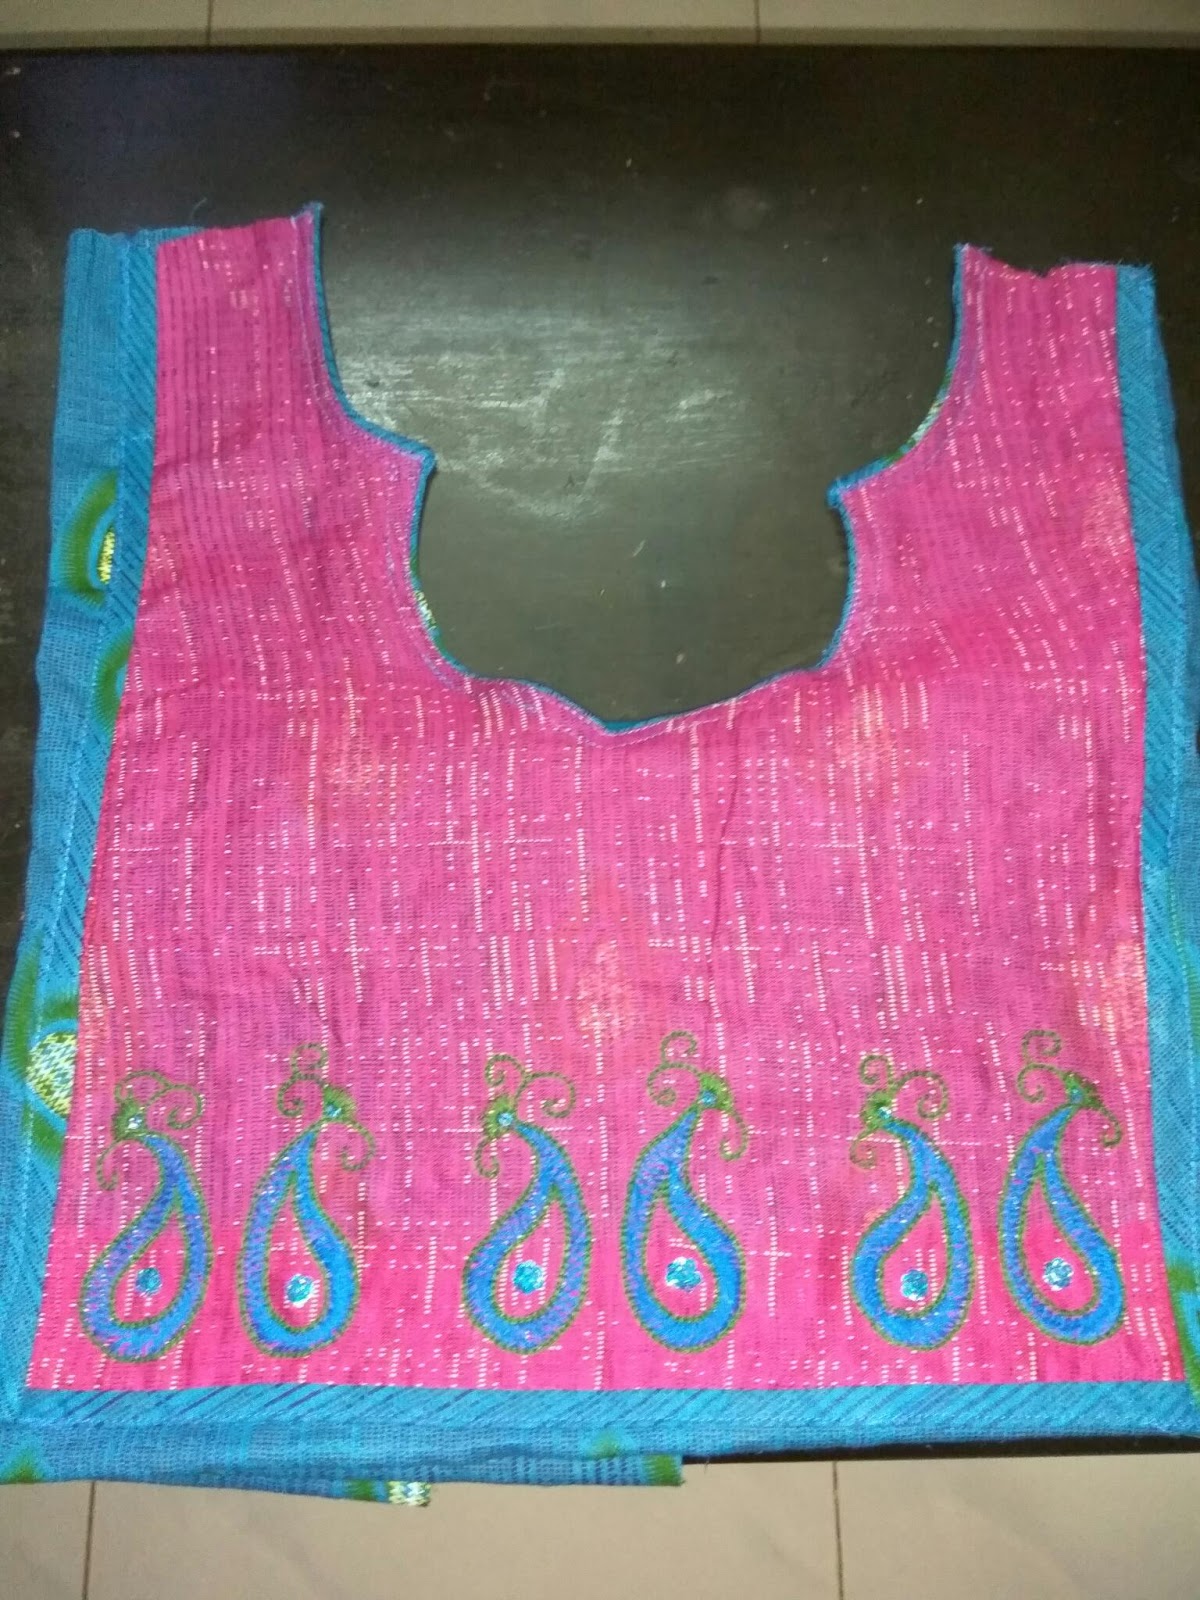
This is final finish of the front of the top. 
As you can see I have stitched the lining on the right side and flipped it over. The I have stitched on all sides to fasten it. 
This is a close up of the front neck. 

Now for the back. The same procedure is followed. As you can see I have stitched on all sides. 

Here is a closer view of the back. 

Then the front and back is joined and sleeves are attached. Below is the finished product. 


              Today I stitched another lining dress where I have tried to put a neckpiece of the pant cloth.

This is the front of the top.


This is the neck piece of the pant cloth to be used.


This is the zari I used along the edge of the neck.

  
This is the finished front part.I have followed the same procedure as earlier.
                               However before attatching the lining and flippin it inside I first attatched the neck piece on the right side.
                              To cover the raw outer edge of the neck piece I stitched the zari border along the edge.

Will finish the top tomorrow and post pictures.


Here is the finished top. 

Tuesday, 13 June 2017

Modified sweet heart neck

Today I stitched a neck for a dress. I call it modified sweet heart neck.
This is the basic top cloth. 
This is the contrast coloured piece of cloth which I want to keep on the neck. So I first fix it on the top along the neck. 

As you can see I have fixed the pink colour cloth on the blue top. Then I have used the blue cloth as Patti along the neck and outer edge of neckline. 

Here is the finished modified sweet heart neck. 

I was planning to add some more authenticity to the neckline. A small sample for the idea. 


Today I stitched another three motifs. Likely to add some more. What do you think? 

This is close-up of the work  I did today. 

I have finished stitching the top. Thinking of doing something to the border. 
Trying to work out the border. 

Finished half of the border. 
Finished the border. 

This is the final look of the dress. 


Sweet Heart neck
-------------------------

Today I cut another top with sweetheart neck.
Displaying IMG_20170710_153749.jpg

I decided to use a maroon coloured cloth as pant .So I thought I could use 
the same in the neck piece.


Displaying IMG_20170710_160413.jpg


This is the neck piece whose outside edges I have folded by 1/4 inch .Then keep the wrong side of the neck piece facing the wrong side and stitch along the neck pattern.


Displaying IMG_20170710_170404.jpg

Now make small slits in the neck pattern taking care to cut only upto the stitch.Flip over the neck piece and stitch along the edge to get the sweet heart neck.
Also stitch the outer edge of the neck piece to fasten it to the  top.


Displaying IMG_20170710_211403.jpg

To further beautify the neck piece i have traced a design to do  Embroidery.I am planning to use chain stitch,buttonhole stitch and herringbone stitch in this design.

Will post the picture after I finish it.

I have used Herringbone stitch,Chain stitch,Detatched Buttonhole stitch and Buttonhole Wheel stitchin this motif.
Above is a closeup of the design I did. 


This is the back portion of the top.


                                          This is the neck piece of the back. I will keep it on the right side and stitch along the edge.
                                           Later I will cut the edges upto the stitch and flip the small cloth inside on the wrong side of the back part.
            By doing this we can cover the raw edges of the neck.


These are the sleeves of the dress.

Lo behold the stitched dress. Hope the procedure was clear. 
I am trying to make some more changes to the top using fly stitch and sequins. 
Finished the fly stitch completely. 
Trying to make the neckline more colourful and filled. 
This is the finished neckline. 

Here is photo of the completed dress. 

Sunday, 11 June 2017

Kasuti embroidery

I have taken a design from the net to put in the bottom border of my Kurti.
I have been working on it for the past 3days.
I do not sit on my work for too long as there are other responsibilities too. So I have been able to finish only 2/3rd of it.

This is only the basic framework of the border. I am planning to add some chain stitch and sequins to it. Will share the photo soon. 
I will be adding a step by step representation in post very soon. It will be of the design which will come all over the body as it will be small. Easy for me to click and post. :) 

Day 4 of my current project. It is taking longer than I thought. But no problem. Sometimes being patient brings out good results. 

Day 6 of Kasuti embroidery  project. Part of the border is done. 

After basic Kasuti embroidery, I am planning to use sequins,  chain stitch  and detatched chain stitch. 
Finished the border at last. Hope to do the rest of the top soon. 
I have used Kasuti, chain stitch, Detatched chain stitch and fly stitch for the border. 

Topping the border with small hearts. 
A purple heart too. 
Hope to get some symmetry. 


Finished stitching the neck using purple and pink cloth as piping. More to come. 
This is the work done so far. I guess I may add two more rows of the heart motif on the body and maybe give some detailing to the neck. 


A closer view of how it looks. Do you like the pattern? 


Hope u got a good look at it. 
Added some more  colour to the neck. 
Here is the finished dress. Hope you like it.